The Invoicing tool includes the ability to send your potential customers an estimate. You can set an expiration date for your estimate, track outstanding estimates, and convert estimates to formal invoices all within our tool.
How to create a new Estimate
Click on the Estimates tab.

Click the New Estimate button. This will take you to the Create an estimate page.
Fill out the appropriate information. Please note that fields with a red asterisk* are required
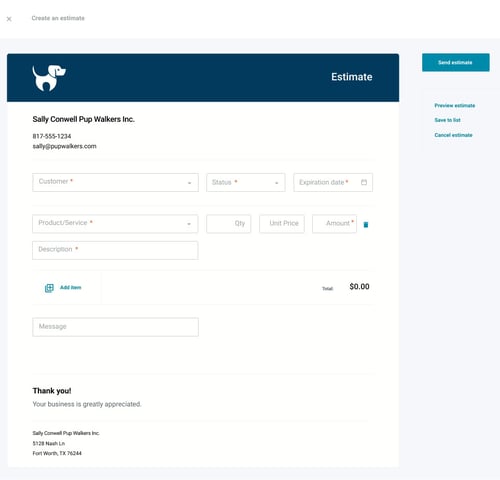
- Customer – This is the person or business receiving your estimate. Click this field to bring up a drop-down menu where you can search for the customer name. If the customer has not yet been added into your Autobooks account, click New customer and add their information.
If you would like to learn more about adding a customer, please click here to view the How to Add a Customer article.
- Select a Status:
- Pending – This status means you are providing a quote that has not been reviewed by your customer, and may be subject to change.
- Accepted – This status means that the customer has agreed with your verbal estimate and wants the estimate in writing to move forward.
- Rejected – This means that the customer did not agree with the provided estimate, and that changes will need to be made before proceeding.
Please note that the Status is simply for your record-keeping and doesn't impact the ability to create an invoice from the estimate.
- Expiration Date – This is the date after which the provided estimate is no longer valid. Once an estimate has expired, it can no longer be turned into an invoice without first updating this date.
- Product/Service – This is the product your business is selling or the service your business is providing as part of this invoice. You can add more than one product or service by clicking the Add item link.
- Quantity (Qty) – This field is for showing the number of products sold or the amount of services provided.
- Price – Enter the amount of the Product/Service you are providing.
Please note that the Amount field is an automatic calculation of the Quantity times unit Price.
- Description (optional) – If you need to add in more details about this estimate, you can do so in here.
- Add item (optional) – If there are additional products/services you need to add to this estimate, insert a new line item by clicking the link.
- Add Discount (optional) - Add any discount to the estimate by clicking the link.
- Edit sales tax (optional) - Edit/change the percentage of sales tax that will appear on the estimate by clicking the link.
- Message (optional) – If there is anything else that you would like to relay to the customer receiving this estimate, you can add a message here.
After you have filled in the necessary information in the template, you will need to take one of the following steps to finish the estimate creation process:
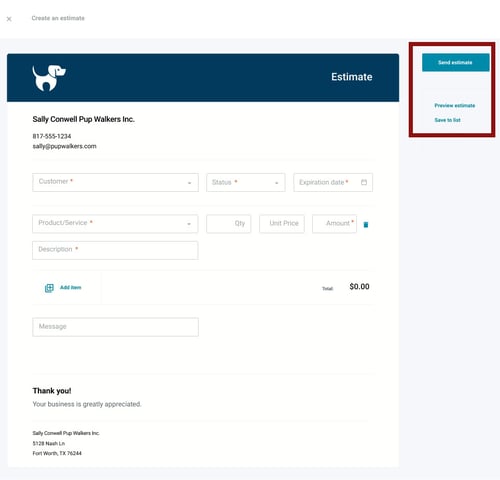
- Click Send estimate to email this estimate to the customer.
Please note that if the customer does not have an email address on file, you will be prompted to enter one before you can send out this estimate.
- Click Preview estimate to view what your customers will see when they receive this estimate.
- Click Save to list option to save this estimate without emailing it to your customer.
Check out our interactive tutorial: