You can use Autobooks to pay your business bills electronically or by printing out a check with your office printer.
Navigate to the Pay Bills section of Autobooks from the left-side menu, then click Pay a bill.

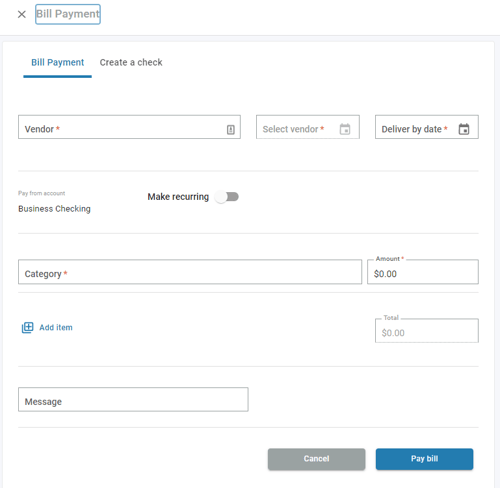
From the Bill Payment page, you have the option for an electronic Bill Payment or to Create a check. Select the desired tab to proceed.
Bill payment
To pay your vendor bill electronically, remain on the Bill Payment tab. Complete the following information:
- Vendor - Select the vendor to pay from the dropdown list displayed. If you need to add a new vendor to the list, select Add Vendor from the dropdown menu and complete the required fields.
Depending on the type of vendor, this online bill pay payment will either be an electronic transfer of the funds, or a physical check that is cut and mailed on behalf of your business to the address of the vendor.
Only approved vendors from your financial institution's bill pay service are eligible for electronic transfer. A quick way to determine eligibility: if the payment has a 2-3 business day turnaround between the send and delivery dates, payment will be made via electronic transfer. A payment that takes between 5-7 business days will be a mailed check.
- Send Date - Select the date you wish the payment to be sent. The Deliver by date field will indicate the anticipated date the payment will be delivered to your vendor.
- Make recurring - Toggle this option to set up a recurring bill payment. Once enabled, the following options are available:
- Frequency: choose Monthly or Yearly recurring payments.
- Frequency option
- Indefinitely: payments will continue until the transaction is canceled from the list.
- # of times: the system will send this many payments following the frequency selected, after which payments will discontinue.
- Select an end date, after which payments will discontinue.
- Category - Choose an accounting category to categorize this payment transaction. Choose the accounting category from the list, and enter the amount for the payment. Additional items can be added to the payment by selecting the Add item link.
- Message - The message field can be used to attach a message with the payment. If you have created a Vendor Invoice for this payment, use the dropdown to select the invoice to match.
When finished, click Pay Bill to schedule the bill payment.
To add a new accounting category, see: Create a new accounting category.
To create a check, see: Create a business check through Autobooks.